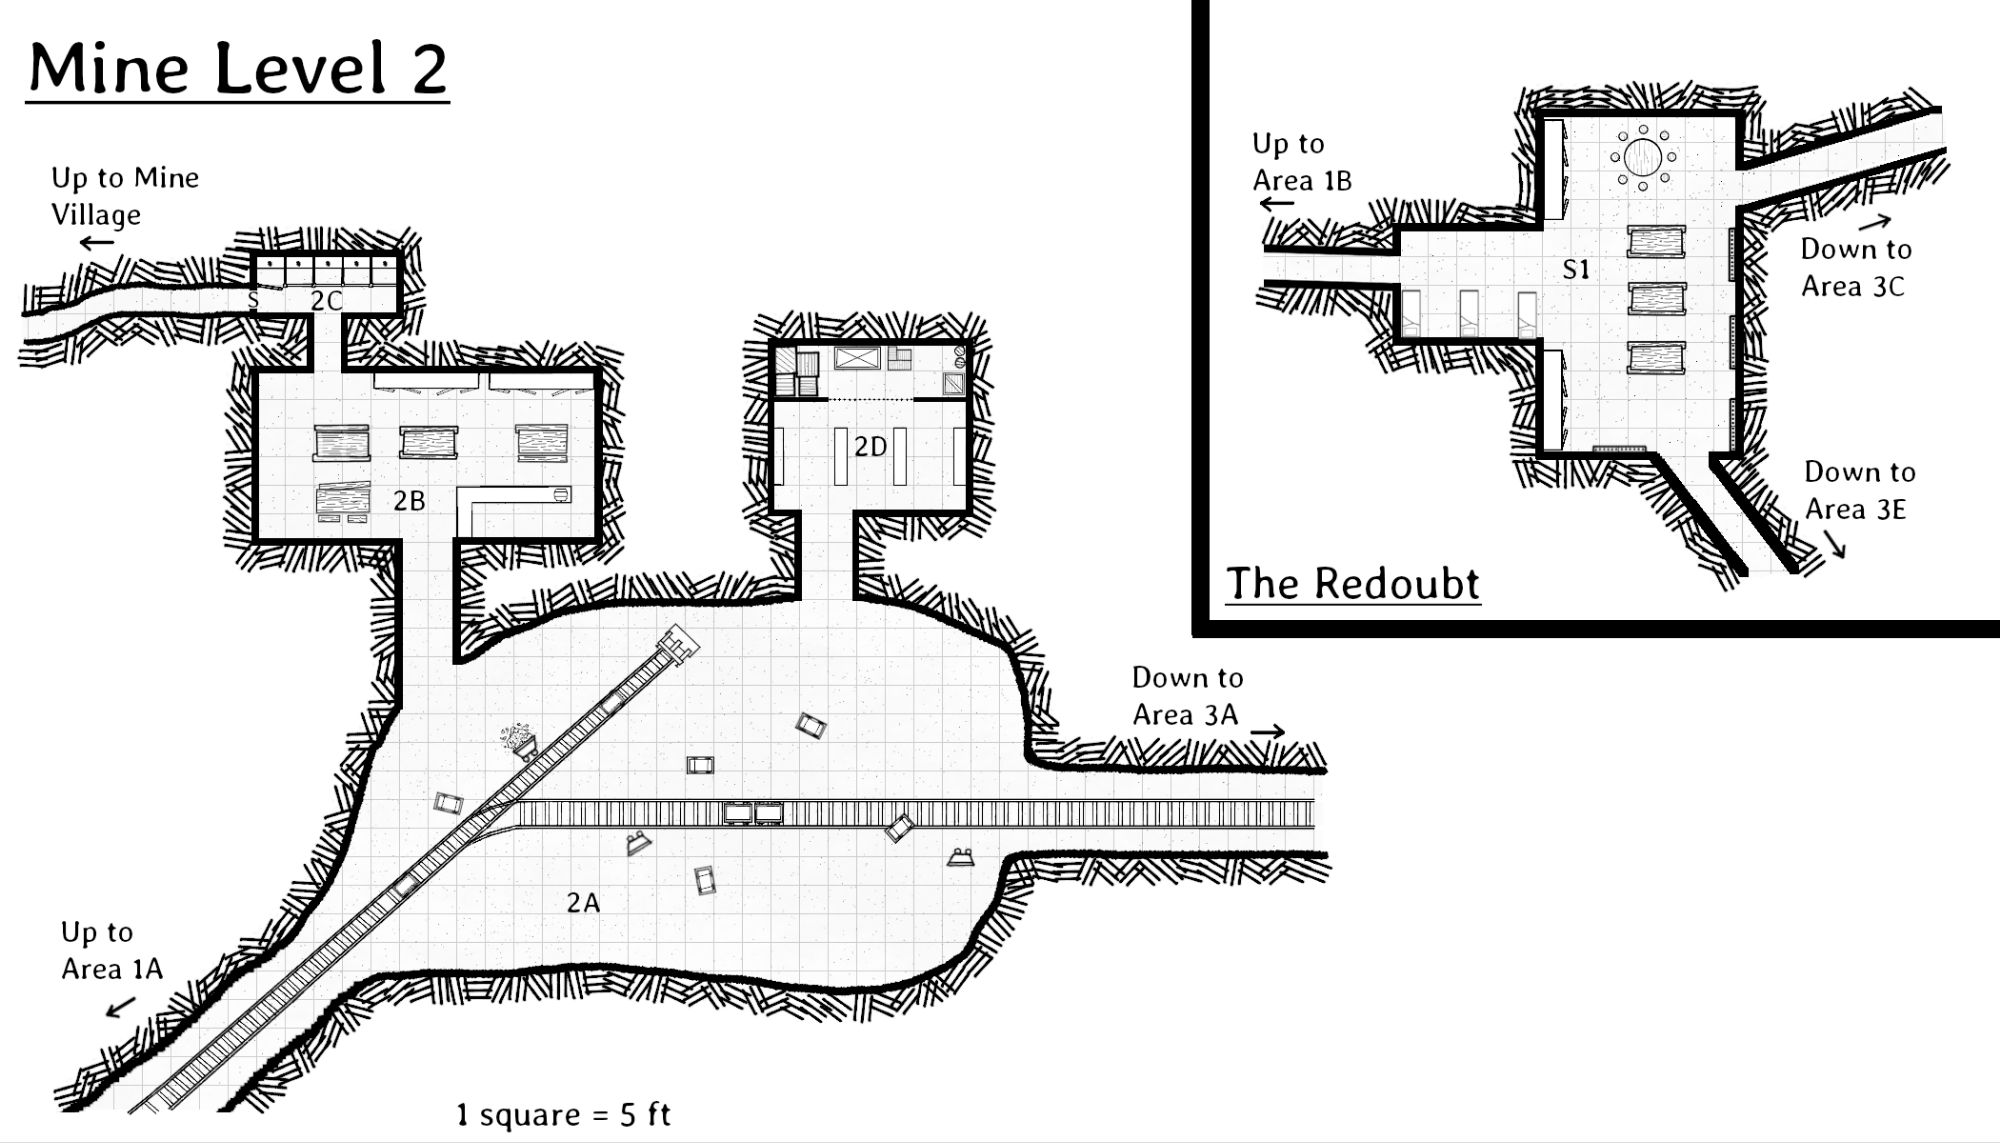
Last week, we shared the second level of the Dwarven Mine from our adventure Depths of the Dwarven Mine.
This week we delve deeper and see how the two different branches of the mine vary in use and purpose and the secret connection that exists.
In the adventure proper, the two different mine tunnels are experiencing different threats, which we’ll touch on briefly. Of course, you can use this map however you’d like!
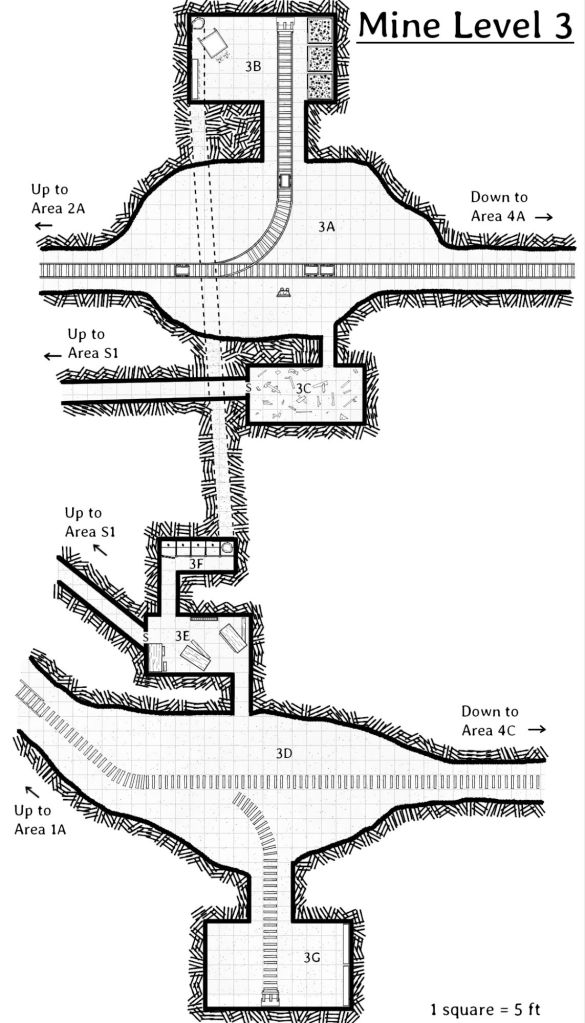
The upper portion of the map (Areas 3A, 3B, and 3C) were all abandoned in hurry as the threat from the deeper parts of the mine worked its way upwards. Area 3A is a large cavern that once had an active ore seam the dwarves worked until they exhausted it. Now it connects tunnels to both Level 2 and Level 4 of the mine.
Area 3B is where raw ore is stored before being sent topside. A secret tunnel connects Area 3B to Area 3F.
Area 3C was once a barracks or common room that has been destroyed by the terrors from below. A secret tunnel ascends from this room to the Redoubt on Level 2.
Area 3D was a similar chamber to Area 3D, but noteably all the steel mine cart rails have gone missing. In this adventure they have been devoured by Rust monsters.
Area 3E is a small mess hall with a secret passage up to the Redoubt and a small latrine in the back, Area 3F. One of the stalls in the latrine is actually the entrance to the secret tunnel to Area 3B.
Lastly Area 3G was a similar ore storage room to that of Area 3B, but once again, the rust monsters got to this room as well leaving only wooden track ties and dust.
You can download the map here, and don’t forget to sign-up for the CritFail.Post if you’d rather get Map Monday’s sent to your inbox…on Friday’s.
-Mike


Leave a comment